Extension: JavaScript Integration – Use of CRM Data
1.1 Example Use case “Login Page Gender”
Context
An e-commerce fashion website aims to enhance user engagement and increase sales by personalizing the Homepage experience based on the user’s gender.
Objective
Enhance user engagement and sales by displaying gender-specific content and recommendations.
Workflow
User Logs In:
System retrieves the user’s gender from their profile.
E.g. via url-parameter “gender=d”
After login the website calls a provided function from Acceleraid (talk to your contact for choosing best method)
Personalized Content:
Male users see different variations of men’s fashion collections and trending male apparel.
Female users see different variations of women’s fashion collections and trending female apparel.
Non-binary users see different variations of mixed or gender-neutral fashion items.
User Interaction
User engages with personalized content, increasing engagement and purchase likelihood.
Feedback Loop
System tracks interactions to refine future personalization variations.
Benefits
Enhanced Engagement: Keeps users interested.
Increased Sales: Drives more purchases with relevantrecommendations.
Customer Satisfaction: Positive user experience with tailored content.
Brand Loyalty: Higher retention and loyalty due to personalized experience.
Example Scenario
User Profile: John Doe, Male, Interested in casual wear and sports apparel.
After Logging In
Homepage: Banner for men’s casual wear and new sports apparel.
John finds relevant and appealing content, increasing his engagement and likelihood of making a purchase.
1.2 Setting up the Use case “Login Page Gender”
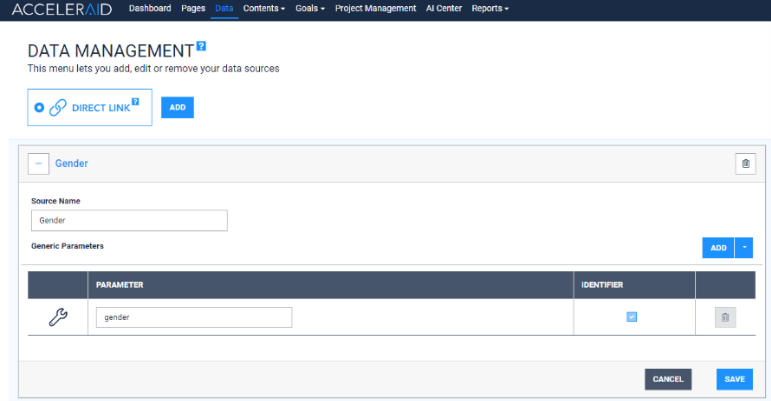
Create Data Source
Navigationpoint: Data
Click on Add
Name the Data Source
Add Query Parameter – “gender”
Save it
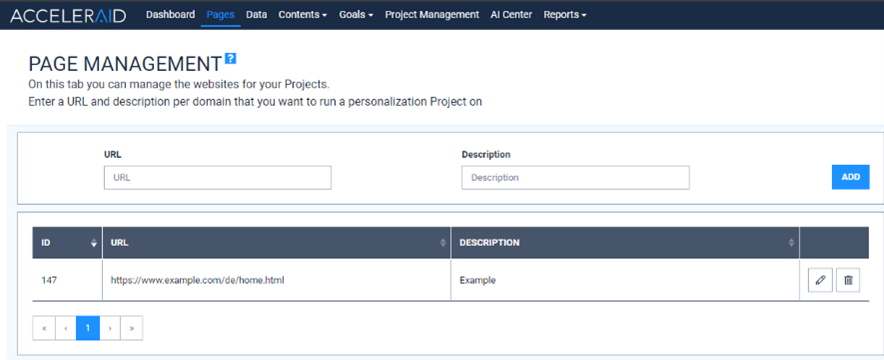
Create a Page
Navigationpoint: Pages
Click Add
Name it and add Description
Save
Create EasyEditor Project
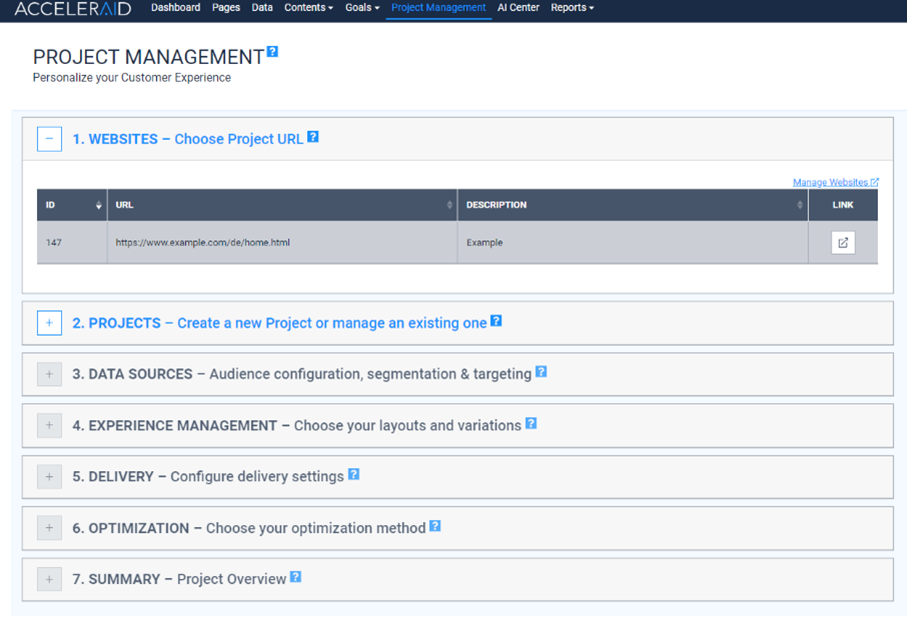
Navigationpoint: Project Management
select at point “1. WEBSITES” the just created Page from last step
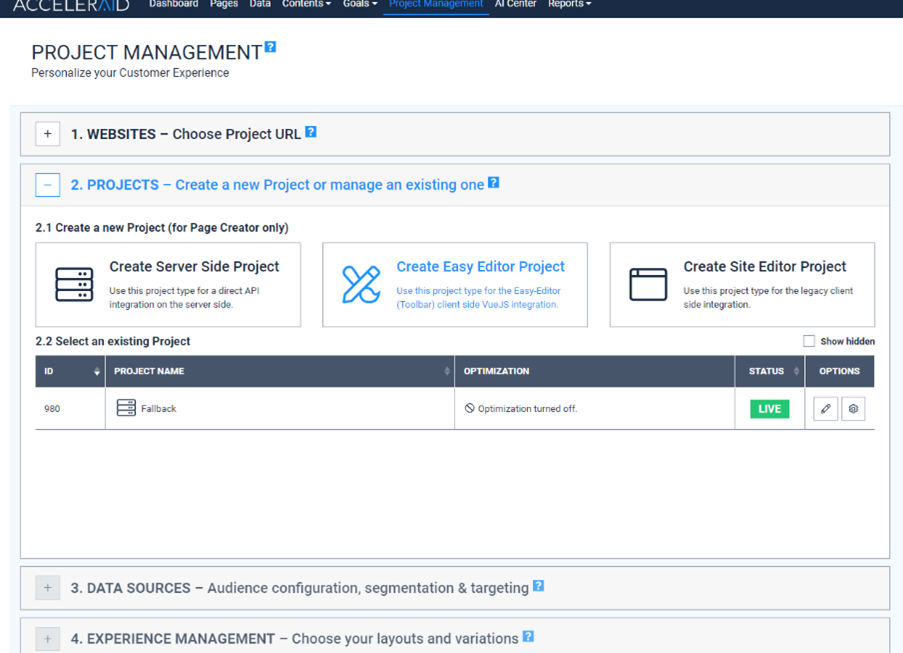
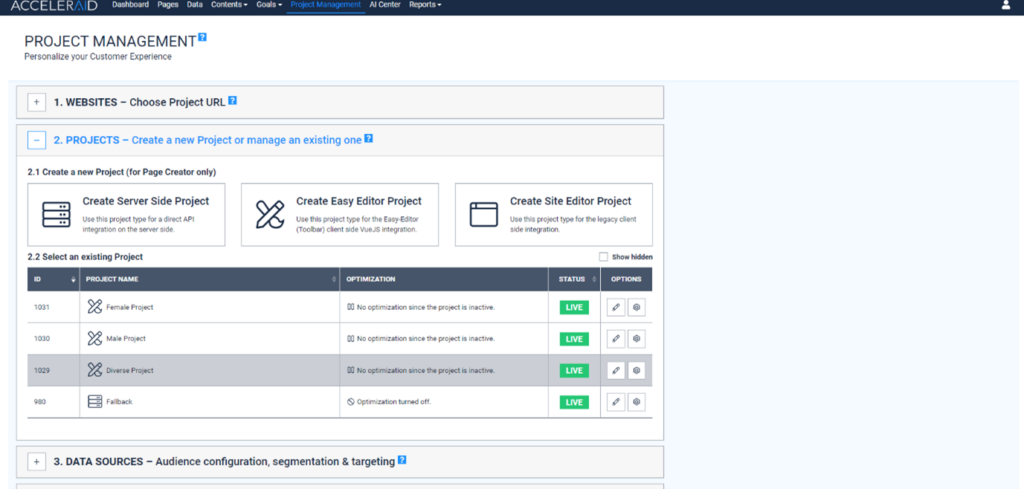
Go to Tab “2. PROJECTS” and Create an EasyEditor Project
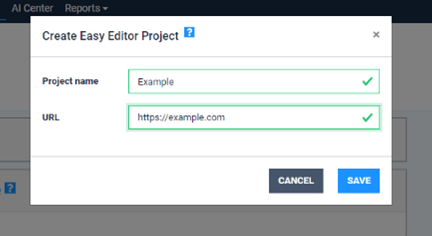
Click on the “Create Easy Editor Project” Widget
Name the project and add an URL
Save it
Activate the Project by clicking on Option symbol and activate in the upcoming Sub Menu
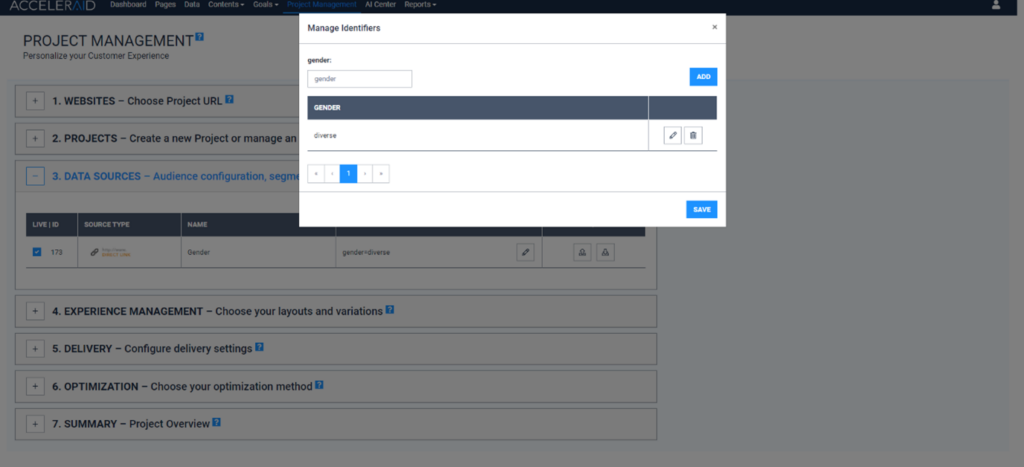
Configure the Gender Data Source
Click on Tab “3. DATA SOURCES”
Assign the Gender Data source by clicking on the checkbox
Add a new value for Gender i.e. “diverse” and click Save
Go to the last Step Summary and save the Project
Repeat the process for all other genders you want to target with specific content.
Screenshot example with setup for 3 genders:
Congratulations! You are done!
Final Behavior of Setup
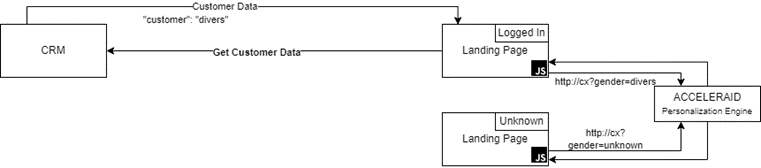
When users login to your url, we deliver the setup content depending on the according gender, the login landing page is personalized based on gender.
1.3 Overview Schematic
Whats next?
We are committed to supporting your success and would be delighted to discuss any concepts or ideas you have in mind. If you have any questions or would like to explore how our personalization solutions can be tailored to your specific needs, please do not hesitate to contact us. Our team is here to assist you every step of the way, ensuring that you achieve the best possible outcomes. We look forward to working together and helping you unlock the full potential of your customer engagement strategies.
Feel free to reach out to us at any time. Your success is our priority.
Contact Information:
Email: support@acceleraid.ai Phone: +49 (0) 621 59 23 41 0 Website: www.acceleraid.ai Thank you for choosing us as your personalization partner.